Black Ops 2 Buried How to Escape the Maze
Shinzuu is an ex-pilot and hardcore gamer. Video games have been the most influential cause of their current skill set and abilities.
Tip 1: Save Some Trash
Believe it or not, you're sometimes better off not opening ALL the barriers by giving Leroy Booze. The reason is that, like doors, these barriers limit the zombies' traffic patterns and behaviors. Sometimes, it might just be the thing that saves your life, or enables you to recover from an accidental down and/or death. Obviously, you want to knock down the ones you can't get past with a Tramplesteam.
Tip 2: Befriend the Biggon
As many of you already know, there is a little friend you can get in this particular map, and his name is Leroy. This lug will make your life a lot easier when playing this map, and is truly a fine asset. You can obtain 2 different items to interact with him: Booze and Candy. Every round, you get each item for free, but you can choose to buy another for 1,000 points if you have more need of him in a round. Whenever you pick up one of these items, Leroy will start following you around. You can speed him up by knifing him. But be sure not to shoot him because he will return to his jail cell and lock himself back up. If one person has candy, and another has booze, he will follow whoever picked up their item first. Now each item has many different effects, and can be used for many different things. Below will be the list the uses and effects.
Booze: When fed to Leroy, he charges in the direction you are facing. (Can be found either in Leroy's cell, or in the saloon.
- Leroy is able to mow down multitudes of zombies. (Does not kill, but forces them to respawn)
- This charge can also be used to knock down barriers blocking your way.
Candy: This treat has multiple effects, depending on the situation. (Found in the Candy Store)
- If fed candy near an empty spot where the mystery box could be, he will go out and bring the box to you.
- If fed candy near a Buildable table, he will build 1 random item, unless a part is on there, or if the other 3 tables have parts already.
- If fed candy at the mystery box, he will pound on it, keeping it from ever leaving again.
- If fed candy near a bonus (i.e. Max Ammo, Carpenter, etc.), Leroy will randomly change it into a different bonus.
- If fed candy next to a crawling zombie (missing 1 or both legs), he will pick it up and cradle it like a baby, and follows you. During this time, the zombie can't die off, and cannot hurt any players. This is perfect for holding the zombie at the end of a round. To kill the cradled zombie, simply knife Leroy, and he will throw the sucker into the ground and stomp it.
- If just fed candy, he will get riled up and start following you, completely demolishing any zombies near you one by one. (Does not kill them, merely forces them to respawn)
As a final note, if you end up shooting Leroy and he locks himself back up, you will need to find his cell key. The cell key can be found in the following places:
- Outside the cell door.
- At the judge's podium in the Courthouse
- 2nd floor of the Saloon in the double-room
- Back door of the General Store
- Behind the deposit window in the Bank
However, you can prevent him from shutting himself in. If you can make it into the cell before or with him, he will not shut the door. However, if you or another player does not have booze or candy, he will shut the door as soon as you leave the cell.
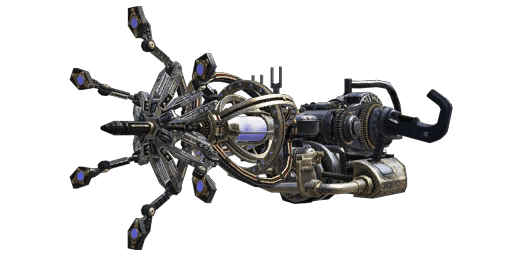
Tip 3: Use the New Wonder Weapon With Unlimited Ammo
That's right, the new Wonder Weapon, The Paralyzer (The Petrifier when Pack-a-Punched), has unlimited ammunition. This large, 2-handed weapon is bulky, slows you down, and prevents you from ever going prone while equipped. When fired, this weapon shoots a continuous AoE blast that slows down zombies and causes them to explode starting with 1 or 2 random limbs, for the duration you hold down the trigger (or until it overheats). The Paralyzer requires recharging by not using it, but you can still burst fire it. However, if it overheats, you will not be able to fire it for a much longer period of time. Also, be careful where you aim it. It also slows down Leroy and thrown explosives. You could accidentally block yourself in a tight area or even kill your teammates if you're not careful.
Aside from attacking zombies, The Paralyzer is able to do a couple other tricks that no Wonder Weapon has been able to do before:
- If another player is in the air from jumping or a Tramplesteam, you can shoot them to give them more airtime to go farther, and towards the direction you're aimed at.
- When jumping off a high ledge, you can shoot the ground to slow yourself down to avoid fall damage.
- When on the ground, you can aim directly down and launch yourself into the air, getting over obstacles easily.
callofduty.wikia.com
Tip 4: Use Exclusive Buildables
Well, there are quite a few things that are exclusive for Buried, and it's unlike anything before. First off, you have 4 Buildable Tables in this map for 4 different items, two of which are brand new:
- Tramplesteam
- Turbine
- Head Chopper
- Subsurface Resonator
The Head Chopper can be placed on any surface, a wall, ceiling or even floor. When on the right height on the wall or low ceiling, it will kill any zombie with a head removal. Otherwise, you're going to chop off their legs and create crawlers. Each time it's triggered, it will swing 6 times. Be careful, though. It will damage players who walk through it. If a player triggers it, it will only swing once.
The Subsurface Resonator requires power from the Turbine to work, but it when it's on, it lets out fat bass beats in increments that creates large sound waves that will obliterate up-close zombies, and knock down further ones. Combines well with the Paralyzer. While the zombies are suspended in mid-air by the Paralyzer, the sound waves actually do more damage, and it takes longer for zombies to recover should your Turbine start running out or the Resonator wears out.
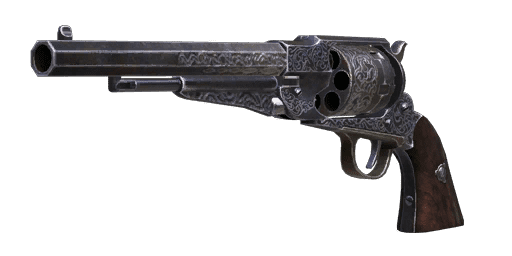
Tip 5: Use the Remington (Dirty Harry Who?)
Another fun exclusive in Buried, the Remington New Model Action Army revolver. The version that is in the game is a .357, a bit of a far cry from the .44 Python that mimics the Colt used by Dirty Harry. But thanks to Call of Duty logic, it leaves the Python in the dust for damage. On top of that, it has great recoil on your controller's rumble, and makes a nice, big boom. When Pack-A-Punched, it becomes the Sassafras. This gun loses its recoil and big boom, but make no mistake that the damage is great. Next to the Python (or Cobra when P-a-P'd), the Remington is 1 round stronger, and reloads faster as it replaces the entire chamber. On top of that, it's the easiest gun to get a certain exclusive passive perk that's in this map! So go ahead, Make Your Day.
Forget The "Click Click" There's Only A Big "BOOM!"
callofduty.wikia.com
Read More From Levelskip
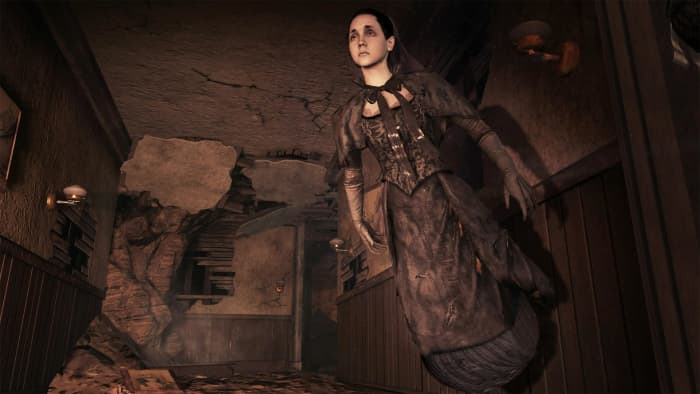
Tip 6: Beware the Gold Diggers
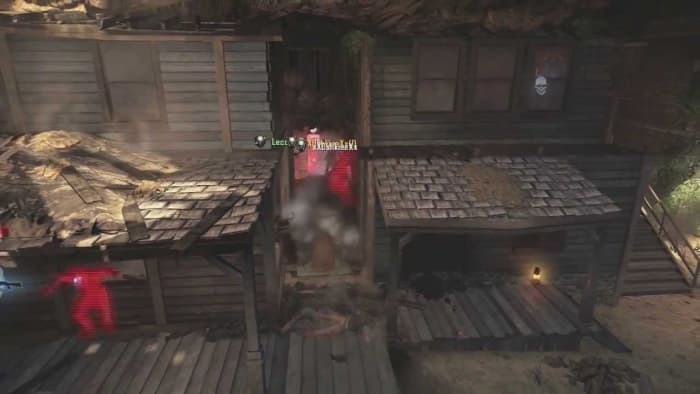
No, you're not digging for any, but there is a bunch of "witches" that will try to take yours. In the large mansion at the West end of the underground town houses Witches that will block your path through the mansion, and if they touch you, will steal a whopping 2,000 points from you. In addition, if you have no points and get hit, it does damage equal to 1.5 times higher than a regular zombie. Also, regular zombies will never spawn inside the mansion, as it is the Witches' territory, where they will endlessly spawn while you're inside. (DON'T BOTHER STAYING IN THE MANSION TO SPAWN ENDLESS WITCHES FOR MONEY. THEY WON'T GIVE ANY, EVEN IF THEY ALREADY STOLE SOME OF YOURS)
When someone enters the mansion for the first time, zombies outside of the mansion will disappear and be replace by Witches. These witches will continually keep spawning no matter how many you kill until the person(s) in the mansion exit through the other side or die. Once there is no longer anyone inside the mansion, the Witches will stop spawning, and give you a Free Perk Bonus as soon as you kill them all off. As the next section will mention, you can leave the last Witch and place down a Time Bomb before killing her. (WARNING: Do NOT get the Free Perk Bonus before activating the Time Bomb. If you do, you will lose that free perk.)
One final note about these Witches. They do not show up outside of the mansion every time someone goes through it. The Witch Spawning is only "activated" 4 or 5 rounds after the last time. You will know when the top three floors of the mansion are lit up. Also, when the Witches in the windows are switching between windows, there will be green smoke each time they disappear. These signs will tell you that you'll be able to start another Witch Spawning to get more free perks.
www.blogspot.com
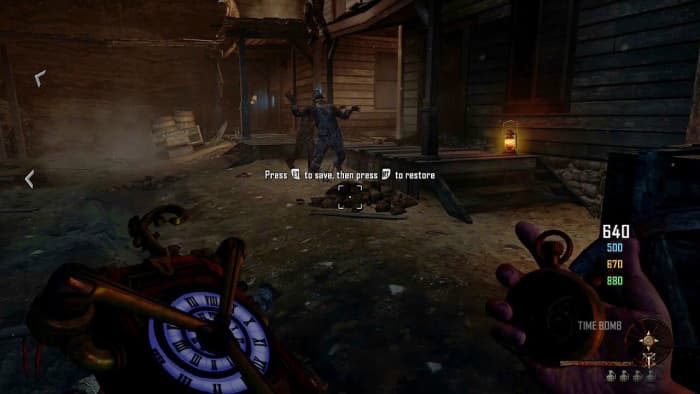
Tip 7: Understand the Time Bomb
Time for the final exclusive item from the Mystery Box that's for this map, the Time Bomb. This little piece of hardware replaces your slot for Monkey Bombs despite the fact that it sits in on your Down D-Pad rather than in the tactical slot. However, the game mechanics will not allow you to have it and Monkey Bombs at the same time. When put down, the time bomb records all players' bank amounts, points on hand, perks, physical location, equipment/weapons, and all map conditions (i.e. which doors/barriers are opened or closed, items built or not built on which tables, etc.). No matter what you or others do after the bomb has been placed, the entire game will revert back to when the Time Bomb was placed down.
However, despite this effect, there are 4 things that are unaffected by the Time Bomb's effects:
- Bonuses (Insta-kill, Max Ammo, Free Perk, etc.)
- Passive Perks (Perma-Perks)
- Kills/Downs/Headshot stats.
- Leroy's imprisonment status. (If Leroy locks himself back in his cell after you already placed the Time Bomb, he will remain in the cell after you activate the Bomb, even if he wasn't there before. It is the same vice versa, as well.)
In other words, if you lose certain Passive Perks later, hitting the Time Bomb to when you had it won't bring it back. However, if you had put down the bomb before killing all witches, you can activate the Time Bomb, grab the Free Perk Bonus and kill the witches again for a 2nd Free Perk Bonus. You can also use this trick when putting money into a Transfer Token. By putting down the Time Bomb before making the token, and then hitting the Time Bomb after making it, all your money resets, but the token is still there, allowing you to double what you have.
Now if you think that's all the Time Bomb can do, you're sorely wrong. Here are other effects the Time Bomb can have just by using it:
- Gives an extra free Candy and Booze if they have already been used.
- Revives any downed players, but they lose their perks.
- Revives any dead players, but they lose their perks/equipment/weapons.
- Resets the life of your Buildables (in other words, if your Trample's about to break from usage, its health is now like you just got it off the table, and will last longer)
So there you have it! Another weird, yet strangely great invention from the developers at Treyarch for your zombie killing pleasure.
Tick Tock
steamcommunity.com
Tip 8: Mark It Twice
As you all know, this map's release came with the release of the Ray Gun Mk. II into all maps. However, in Buried, you have a better chance of getting this exceptionally powerful weapon. In other maps, your chances of getting the Ray Gun Mk. II is at 0.035%, 0.5% if everyone in the room has the Buried map downloaded. In non-story survival maps, your chances of receiving it are 0.025% and 0.4% if everyone has the Buried map downloaded.
While playing Buried, your chances of obtaining the weapon is a crazy 5%.
Tip 9: Use New Passive Perks!
In addition to the Passive Perks that you get in Die Rise and Tranzit, Buried has more Passive Perks that are exclusive to this map only. It's not a lot, but they're exceptionally useful in a tight pinch:
- Desperado Double Points (Yes, they've made a DP perk! And what's better, it stacks with the Double Points Bonus.)
- PHD Flopper (They've finally given it to us in the form of a Passive Perk. However, unlike the original, there are limitations. You take fall damage now, if you're not diving.)
- Boosted Box Bear (As you all know, in Die Rise and Tranzit, you can potentially earn a Teddy Bear on top of the Mystery Box that increases your chances of getting better guns/items. But in Die Rise, it's easier to get it, and has a slightly different effect.)
These new Perks shall be explained in the following table. Keep in mind that you cannot lose these in other maps, neither can you get them in other maps. They are exclusive for Buried, ONLY.
All original Passive Perks that you had in Tranzit and Die Rise will transfer from and to this map.
| Perk | Effects | How to earn it | How to lose it |
|---|---|---|---|
| Desperado Double Points | Doubles the points you get when injuring zombies. | Get 10 to 25 1-shot kills with pistols (Mustang & Sally excluded). | Get a kill with any Weapon that's not a pistol (including explosives. Buildables excluded) OR getting a headshot |
| PHD Flopper | Take no explosive damage. Create a giant explosion whenever you dive off a high place. | Take fall damage 8 times without going down. | Taking any fall damage. |
| Boosted Box Bear | Same effects of regular box bear. Boosts chances of getting Ray Gun Mk. II to 15%, Ballistic Knife to 25%, Time Bomb to 3% and HAMR to 35%. Reduces chances of getting other weapons except Galil, DSR50, M1216 and S-12. | Pick up a bunch of bad guns from the box. | Don't pick up guns from the Mystery Box 10 times in a row or starting a new game. |
The Teddy Bear Can Bring Luck
www.youtube.com
Tip 10: Choose a Spot (Not the Usual Place)
Aside from the listed areas, there's also one more spot you can go to. This can also be the place to hole up if you want to do the trophy/achievement, Mazed and Confused, where you have to survive an entire round in the Maze in round 20 or later. First off, you want to get the maze where the door in the center of the maze that leads to the Mansion is CLOSED. If it is not, you can just exit and come back. You then want to make your way to the center by taking a side route. Before going here, be sure to have both fountains opened before attempting this.In here, there's only 2 zombie spawn points, both of which you can choose to have Tramplesteams and/or Head Choppers to cover. Then, all you have to do is kill zombies coming in from the only path left to enter the middle, the way you came in. The path is fairly long and funnels zombies very well. This area's actually good through round 28.
www.youtube.com
Tip 11: Same Tune, Different Choir
Now this map has its own type of gameplay, but like Die Rise and Tranzit, you'll need to try to separate your group into 2 if you have 3 or 4 players. The reason you want to do this is because you want to lower the flow of zombies to make the higher rounds easier and more bearable. There are two main places that you'll find to be the best hole up spots: Juggernog hallway and the Church. Juggernog is by far the most popular and well-known, but not the most practical if that's the only place everyone's holing up in. The Church is a more practical area to be if you're going to have everyone hole up in one place.
Now, Juggernog hallway is very self-explanatory. You hole up next to it with the hallway littered with 2 Head Choppers and 2 Tramplesteams. What most people fail to remember to do is to put a Subsurface Resonator or two at the back of Juggernog and then both players hold onto Turbines so they can use the Resonator should it start getting crowded.
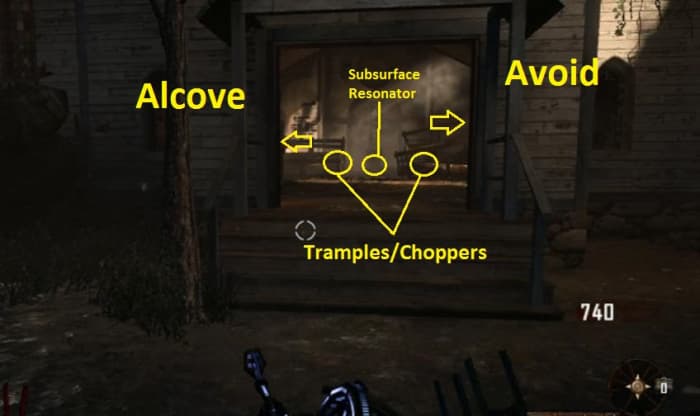
Now for the Church, there is a different approach. First off, you want to have 1 Tramplesteam and 1 Head Chopper per window at the back. This will prevent you from being hit from behind. Also, place a Resonator right behind the altar, facing down the center aisle, and the second one in the alcove as a backup, aimed at the altar. The entire area in front of the altar, before you run into the aisle and leading towards the alcove should be littered as a minefield of claymores. By having that minefield, it gives your emergency Turbine time to power up the two Resonators, and allows your team to retreat into the alcove to get away from a potentially overwhelming horde. Now as you know, there are two aisles in the church, but if everyone in the church are lined up with the center aisle, or lean more towards the alcove, zombies will not go down the wall aisle, perfectly funneling all zombies down the center aisle only.
Regardless of which team you choose to be in, be sure that by round 25, you regularly replace your Buildables every round or two as they will get used up quite quickly when you get this far with 3 or 4 players.
Outside of these two places, you also have Training Areas in this map, though they are quite small. But if you're not very experienced, it's not entirely recommended. The following areas are the best areas to be running trains:
- Saloon Area: This area has many zombie spawn points in the ground, but if you utilize the stairs that lead to the bank, and jumping over to the Gunsmith, you can easily run a train in this area. To make it easier, it's recommended that you also have the PHD Flopper Passive Perk.
- Main Jailhouse Street: This has one of the highest number of spawns in the map, but you can easily run this if you can utilize the obstacles and run close to the buildings as well. Zombies in this map have a habit of jumping up on any area they can if you're close to those spots. Also be sure to utilize the stairs that lead up to the 2nd floor of the Jailhouse.
- Candy Shop Crater: Between the Candy Shop, Witch's Mansion and the Church, there's a little crater with a lot of trees surrounding it. You can run a train of zombies there, utilizing the edge of the crater to slow zombies as they have to take time to jump down. This specific area is fairly pointless with guns, it's mainly a PHD Flopper zone. While running the train, you can easily leap off the edge of the crater and kill almost every single zombie chasing you.
While these two strategies are quite different, if your party is good enough, you can actually combine the Church, Juggernog, Jailhouse Street AND the Candy Shop Crater to minimize the number of zombies everyone has to deal with. The best part is that the runners, if in trouble, can easily retreat towards the two camping areas safely while the camp spot players utilize their Resonators and/or Petrifier to cover the retreats. Monkey Bombs can also help, too.
Tip 12: Samantha's Awakening
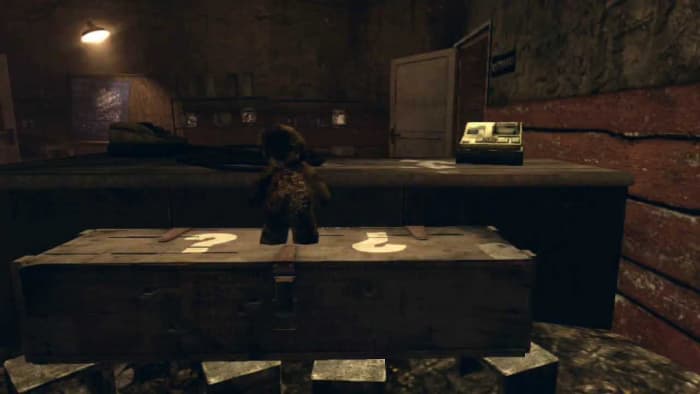
Want to see Samantha sneaking in a moment to check on you? Don't lock the Mystery Box at the Jailhouse and make sure it moves elsewhere. Afterwards, stand in front of where the Mystery Box used to be, and stare at the Teddy Bear. It will lift its head up and survey the area before going limp and "acting normal".
Tip 13: The Awakening
Aside from Storyline Easter Eggs, all the main maps have separate trophies as well. However, of all of these extra trophies, Awaken The Gazebo is the hardest to achieve. But fret not, it's actually very easy if you know what the heck you're doing, but the last leg is all about skill. The following video will show you how you can do it. When done right, it should only take about 10-14 minutes. However, the average person takes 20-30 minutes to do it the first time, and usually fails up to 5 times.
Tyrone on August 01, 2016:
Love it keep it up
Itzvoltse on June 16, 2016:
Thanks for the tips and tricks im at school too looking for tips :) im lucky this site is not blocked... :D
Corey on September 08, 2014:
Thanks for that I'm at school and looking for tip and tricks for buried really appreciate that this website isn't blocked! :) :) :)
Black Ops 2 Buried How to Escape the Maze
Source: https://levelskip.com/first-person-shooters/Black-Ops-2-Zombies-Buried-Guide